

100 Dreams - Patchwork Twirly Dress - by Monique Daley 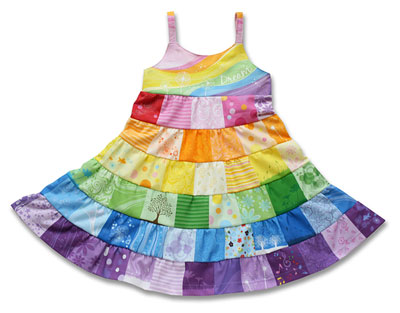 A twirly patchwork dress with 100 rainbow colored squares - all the fun of a twirly patchwork dress, without the hours of work of actually patching that many squares together! A twirly patchwork dress with 100 rainbow colored squares - all the fun of a twirly patchwork dress, without the hours of work of actually patching that many squares together!
Adjustable straps for a great fit on children aged 2 through 6 (approximately). From the lowest point on the neckline to the bottom of the dress is 22". The chest of the dress measures 24" in circumference. 1/4" seam allowance included on all pattern pieces. You can purchase the 100 Dreams dress printed on one yard of quilting weight cotton from Spoonflower if you would like to sew your own 100 Dreams dress! 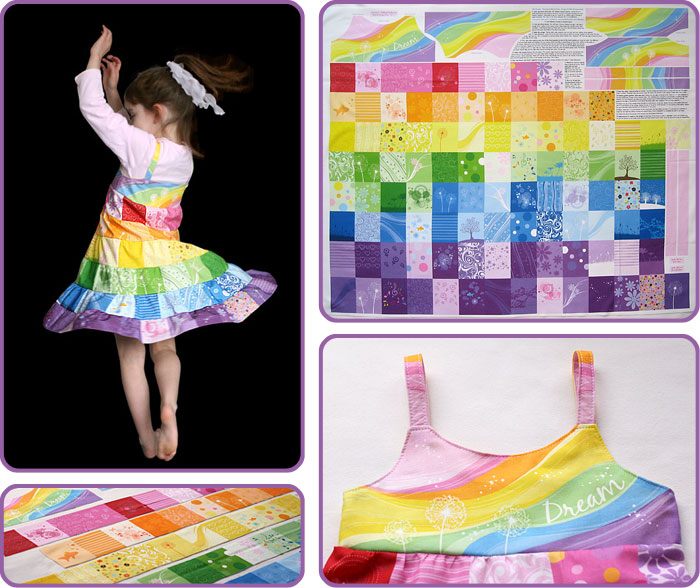 INSTRUCTIONS 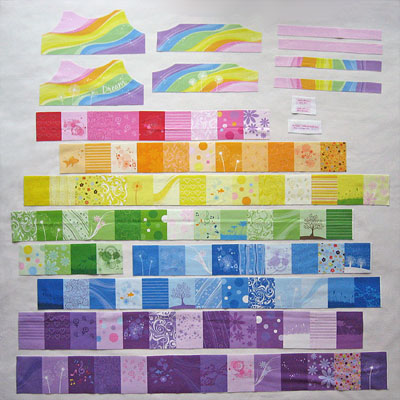 1. Cut out dress pieces. You will have: 2 fronts, 2 backs, 4 straps, 1 red strip, 1 orange strip, 1 yellow strip, 2 green strips, 2 blue strips, and 2 purple strips. 1. Cut out dress pieces. You will have: 2 fronts, 2 backs, 4 straps, 1 red strip, 1 orange strip, 1 yellow strip, 2 green strips, 2 blue strips, and 2 purple strips.
Also included: a 100 Dreams label and Made with Love from Mom/Grandma labels that you can sew onto the inside of the dress if you wish. 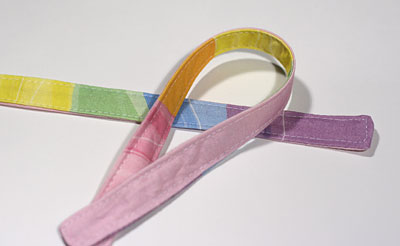 2. Sew the straps. Placing rights sides together, sew one pink and one rainbow strap together with 1/4" seam allowance. Leave one of the short ends open to allow for turning. Repeat on 2nd strap. Turn the straps right side out. 2. Sew the straps. Placing rights sides together, sew one pink and one rainbow strap together with 1/4" seam allowance. Leave one of the short ends open to allow for turning. Repeat on 2nd strap. Turn the straps right side out.
Tip: A chopstick or narrow dowel works well for this. Topstitch 1/8" from the edge around the three sewn sides of the straps. 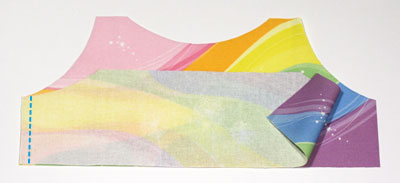 3. With right sides together, sew one of the front panels to one of the back panels just along the sides. Two different front and back panels are included. You can choose which you'd like to have facing out (the other will be on the inside of the dress). Make sure to put the front and back panel that you want facing out together when you sew the front to the back. Repeat for the other set of front and back panels. 3. With right sides together, sew one of the front panels to one of the back panels just along the sides. Two different front and back panels are included. You can choose which you'd like to have facing out (the other will be on the inside of the dress). Make sure to put the front and back panel that you want facing out together when you sew the front to the back. Repeat for the other set of front and back panels.
Turn one of the front/back panel pieces (now in a circle) so that it is right side out. Place that piece inside the other front/back panel circle. The fronts and backs should align and the right sides should be facing each other. Pin, pin, pin. 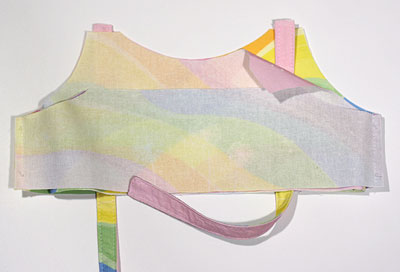 4. Insert the straps between the two layers. The unsewn edge should be sticking out of the top between the strap areas on the front panel side. The sewn edge will be dangling out the bottom of the front panel (toward where the skirt will be attached). Make sure that the strap color/design that you want on the outside of the dress faces the front panel that you want on the outside of the dress. Pin in place. 4. Insert the straps between the two layers. The unsewn edge should be sticking out of the top between the strap areas on the front panel side. The sewn edge will be dangling out the bottom of the front panel (toward where the skirt will be attached). Make sure that the strap color/design that you want on the outside of the dress faces the front panel that you want on the outside of the dress. Pin in place.
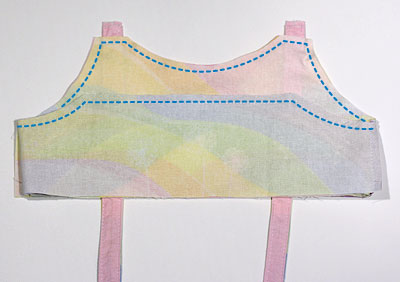 5. Sew the fronts and backs together along the top edge (armpit, straps, neckline, etc) using 1/4" seam allowance. 5. Sew the fronts and backs together along the top edge (armpit, straps, neckline, etc) using 1/4" seam allowance.
 6. Notch (or use your pinking shears) along the curves. Turn right side out. Topstitch 1/8" from the edge around the sewn top edge of the front and back. 6. Notch (or use your pinking shears) along the curves. Turn right side out. Topstitch 1/8" from the edge around the sewn top edge of the front and back.
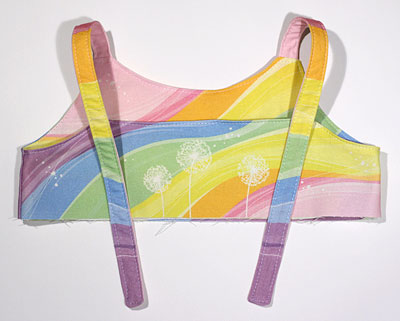
7. The top part of the dress is done, do a little happy dance. 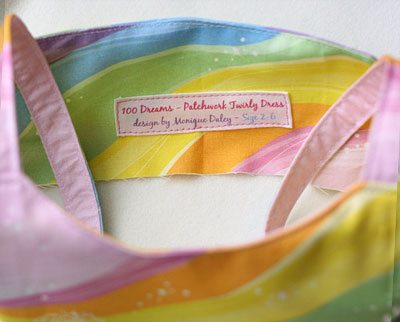 If you'd like to attach a tag to the dress, you can either sew it to the inside back panel as one of your first steps or you can do so at this time. If you do it at this time, just make sure to only sew it through the inside layer of the back panel. I simply cut around the tag with a little seam allowance and then folded the edges in and topstitched it on. If you'd like to attach a tag to the dress, you can either sew it to the inside back panel as one of your first steps or you can do so at this time. If you do it at this time, just make sure to only sew it through the inside layer of the back panel. I simply cut around the tag with a little seam allowance and then folded the edges in and topstitched it on.
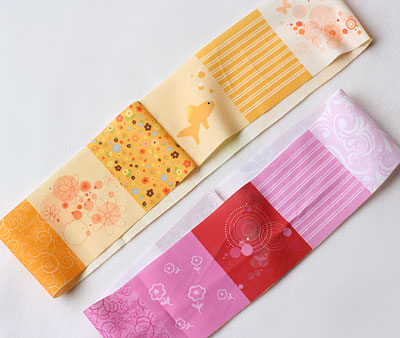 8. Sew (or serge) the red patchwork strip in a circle. Place right sides together, using a 1/4" (or even 1/8") seam allowance. 8. Sew (or serge) the red patchwork strip in a circle. Place right sides together, using a 1/4" (or even 1/8") seam allowance.
9. Sew the other colored strips in circles. Sew the orange patchwork strip in a circle and then sew the yellow strip in a circle. The green, blue and purple strips will need to be seamed in two places to make them into a circle. 10. Gather, gather, gather. Sew, sew, sew. Gather the top edge of the red circle. There is a 1/4" seam allowance at the top and bottom of each of the colored strips. Use a basting stitch and pull on the thread(s) to gather it the right amount. Or sew along the top edge using elastic thread in your bobbin (shirring the top of the fabric). Or use your serger's gathering foot (my personal favorite). Pin the gathered red edge to the bottom of the top of the dress (right sides together). Sew or serge together. 11. Gather the top of the orange circle and sew it to the bottom of the red. Gather the top of the yellow circle and sew it to the bottom of the orange. Gather the top of the green circle and sew it to the bottom of the yellow. Gather the top of the blue circle and sew it to the bottom of the green. 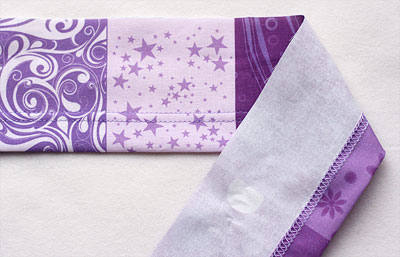 12. Hem. Fold over 1" on the bottom of the purple layer and hem (just fold 1" to the back and topstitch, or serge the raw edge first before turning and topstitching, or use a coverstitch to complete the hem in one step). 12. Hem. Fold over 1" on the bottom of the purple layer and hem (just fold 1" to the back and topstitch, or serge the raw edge first before turning and topstitching, or use a coverstitch to complete the hem in one step).
13. Gather the top of the purple circle and sew it to the bottom of the blue. 14. Add buttons or snaps to the straps and back part of the dress to make it adjustable. If you use a button, you can put the button on the inside of the dress and make several button holes along the end of the strap for adjustability. The straps can either go straight over the shoulder and connect to the back or can crisscross in the back. 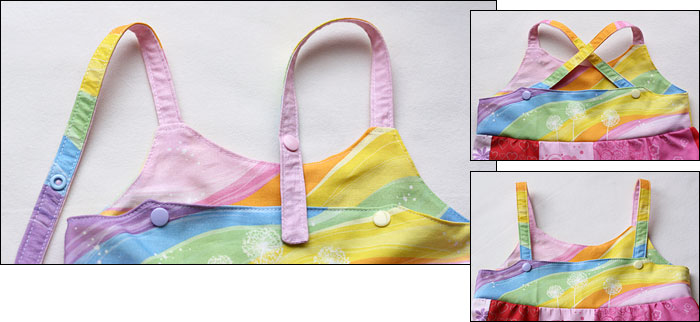 |
||
© 2019 Sew Me a Garden. All rights reserved.